
Lorem ipsum dolor sit amet, consectetur adipiscing elit. Quisque ut ullamcorper libero. Cras lacinia aliquet mauris, nec semper enim vulputate vitae. Mauris nec nisi congue sem suscipit lacinia nec eget libero. Integer bibendum, mi eu pretium sagittis, arcu dui gravida elit, vel aliquam odio ante eu lectus. Curabitur id vehicula ex.
explore
welcome to our
home on the web
Weddings
Portraits
Engagements
personal
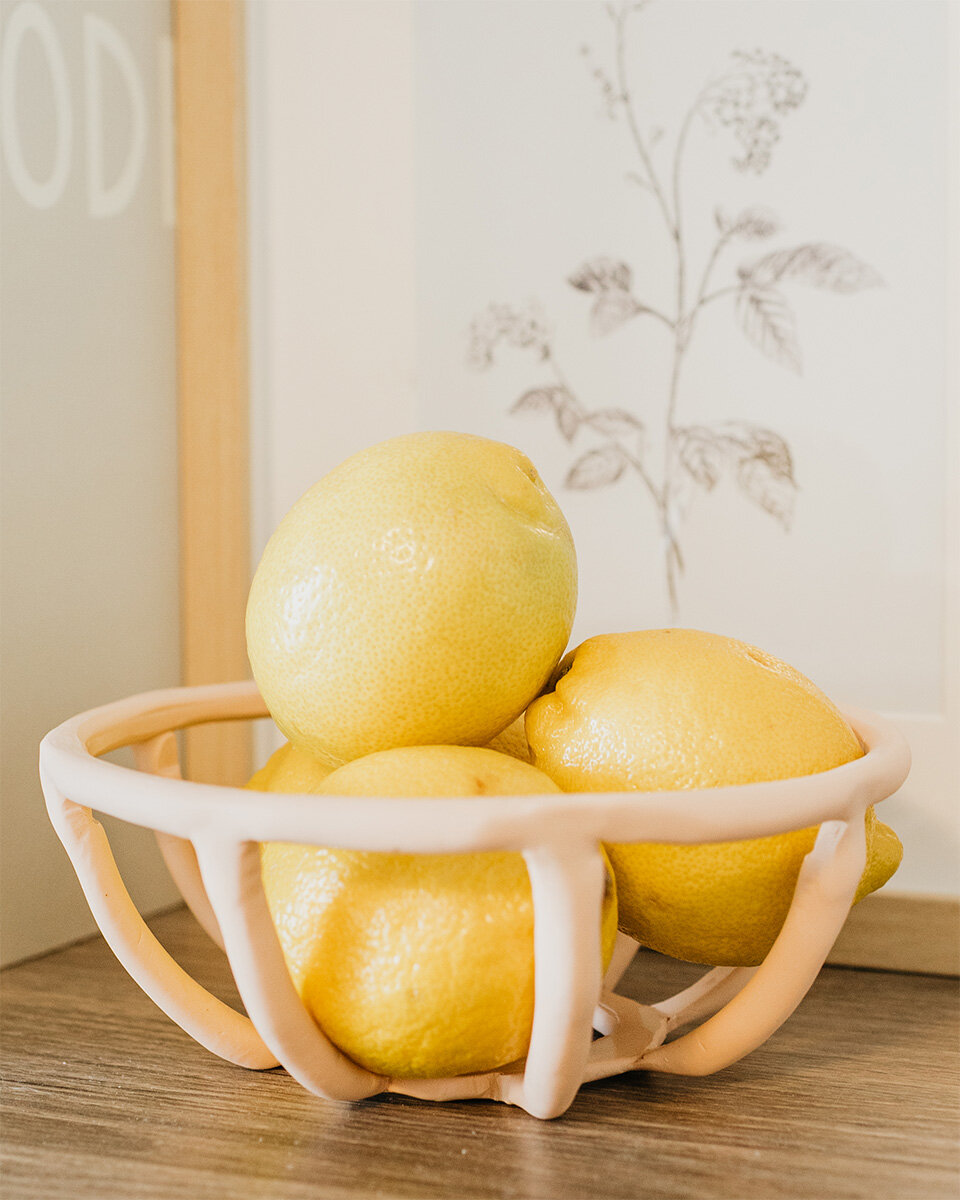
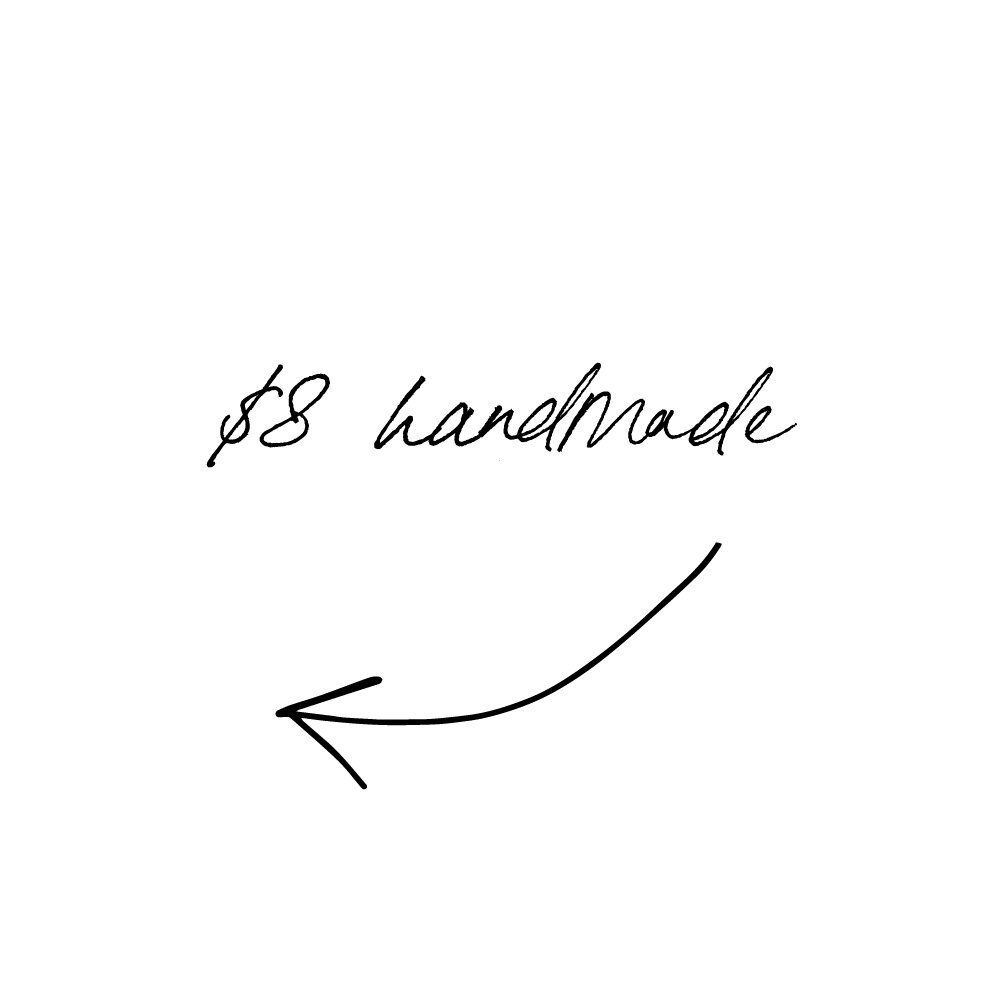
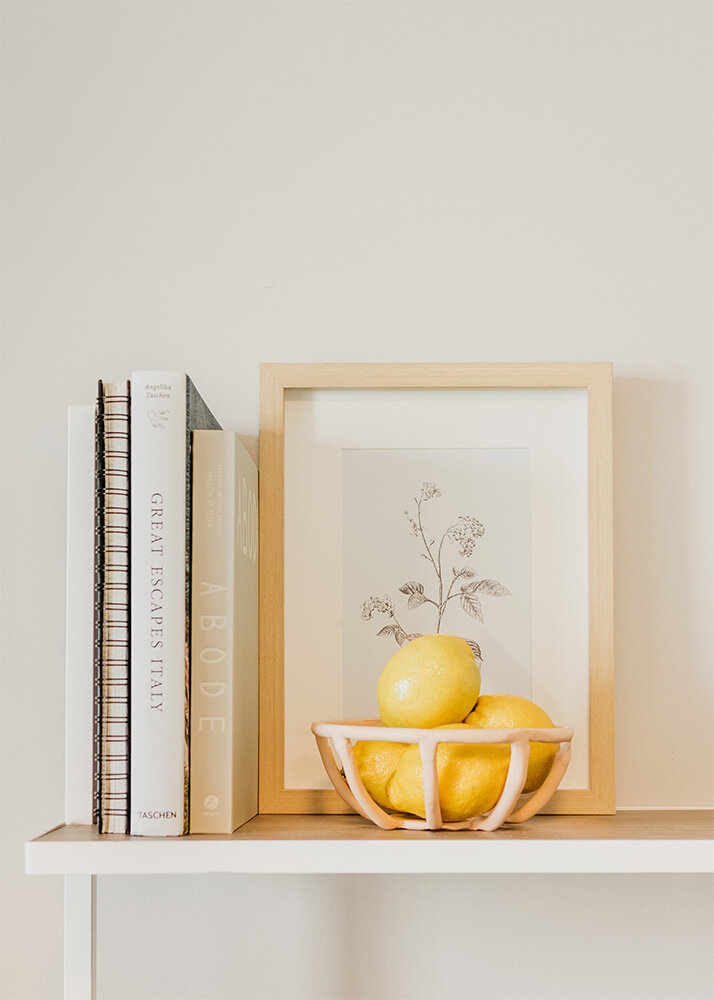
DIY Coil Prong Fruit Bowl
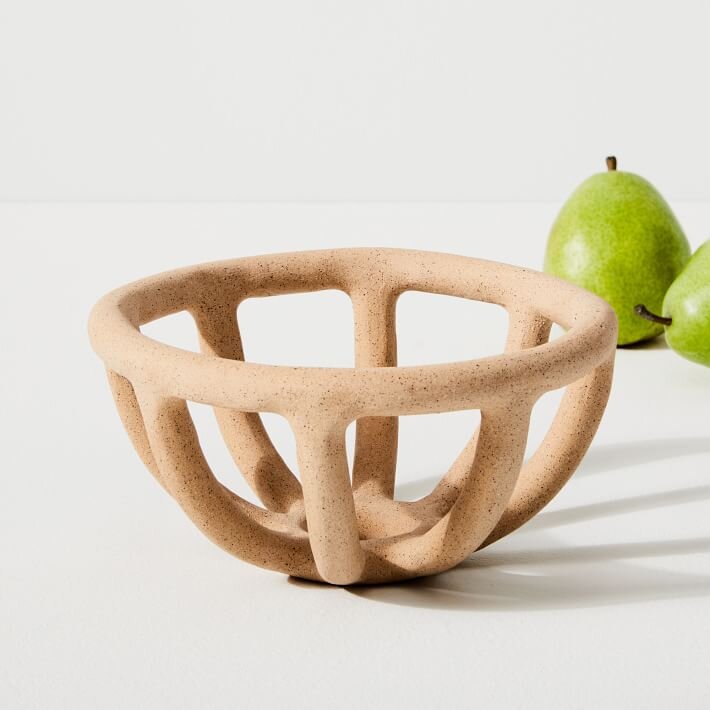
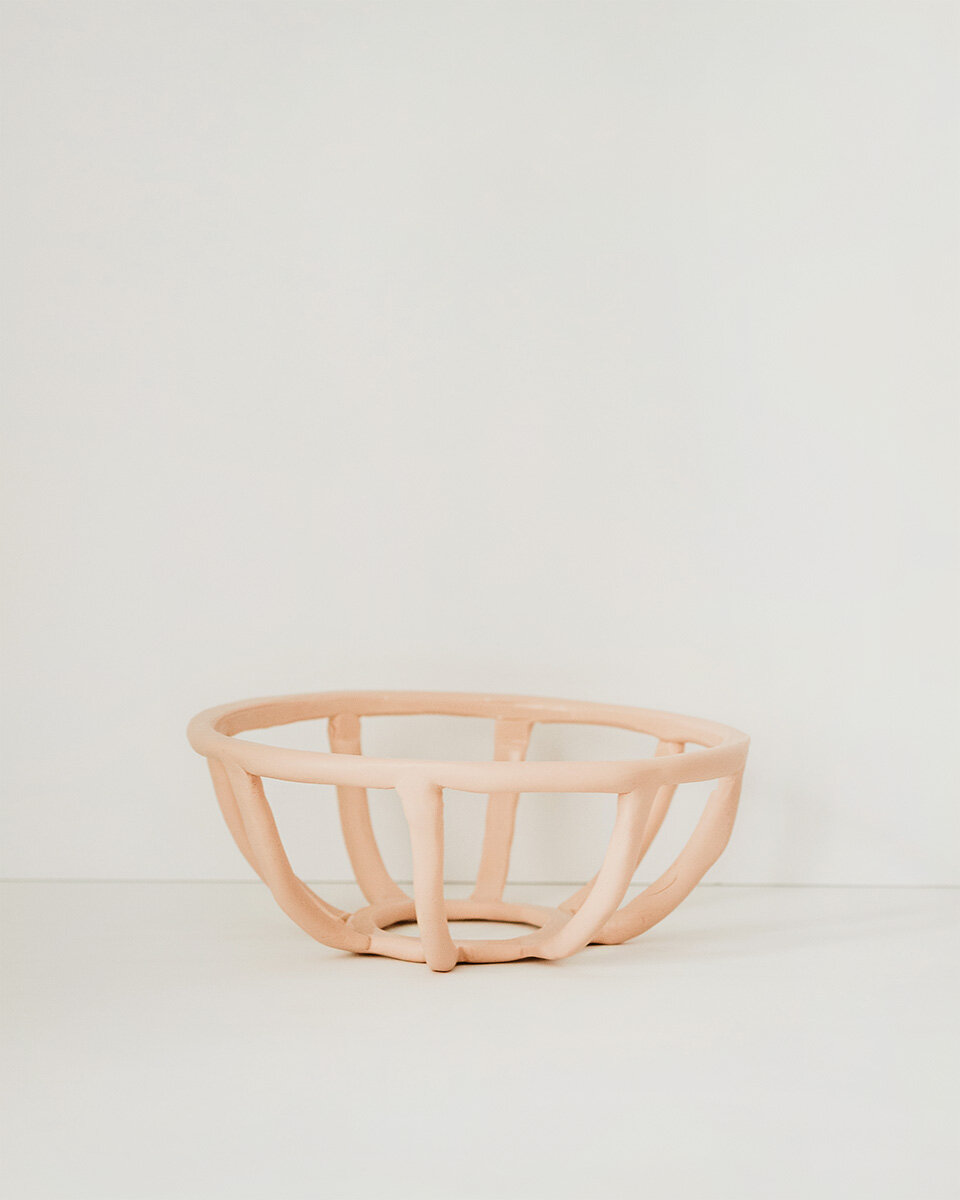
These adorable and unique fruit bowls caught my eye the first time I saw them and I have been wanting one ever since. The only thing that stopped me from ordering one was the price tag. The small clay bowl below from West Elm is $64.00 which is why I decided to make my own to get the same look for less.
This easy DIY fruit bowl project was also a fun way to get my hands on some clay and feel creative. If you also love handmade home decor projects, keep reading to learn how to make your own fruit bowl.
#block-yui_3_17_2_1_1614262732835_52003 .sqs-gallery-block-grid .sqs-gallery-design-grid { margin-right: -10px; }
#block-yui_3_17_2_1_1614262732835_52003 .sqs-gallery-block-grid .sqs-gallery-design-grid-slide .margin-wrapper { margin-right: 10px; margin-bottom: 10px; }
#block-yui_3_17_2_1_1614262732835_124964 .sqs-gallery-block-grid .sqs-gallery-design-grid { margin-right: -10px; }
#block-yui_3_17_2_1_1614262732835_124964 .sqs-gallery-block-grid .sqs-gallery-design-grid-slide .margin-wrapper { margin-right: 10px; margin-bottom: 10px; }
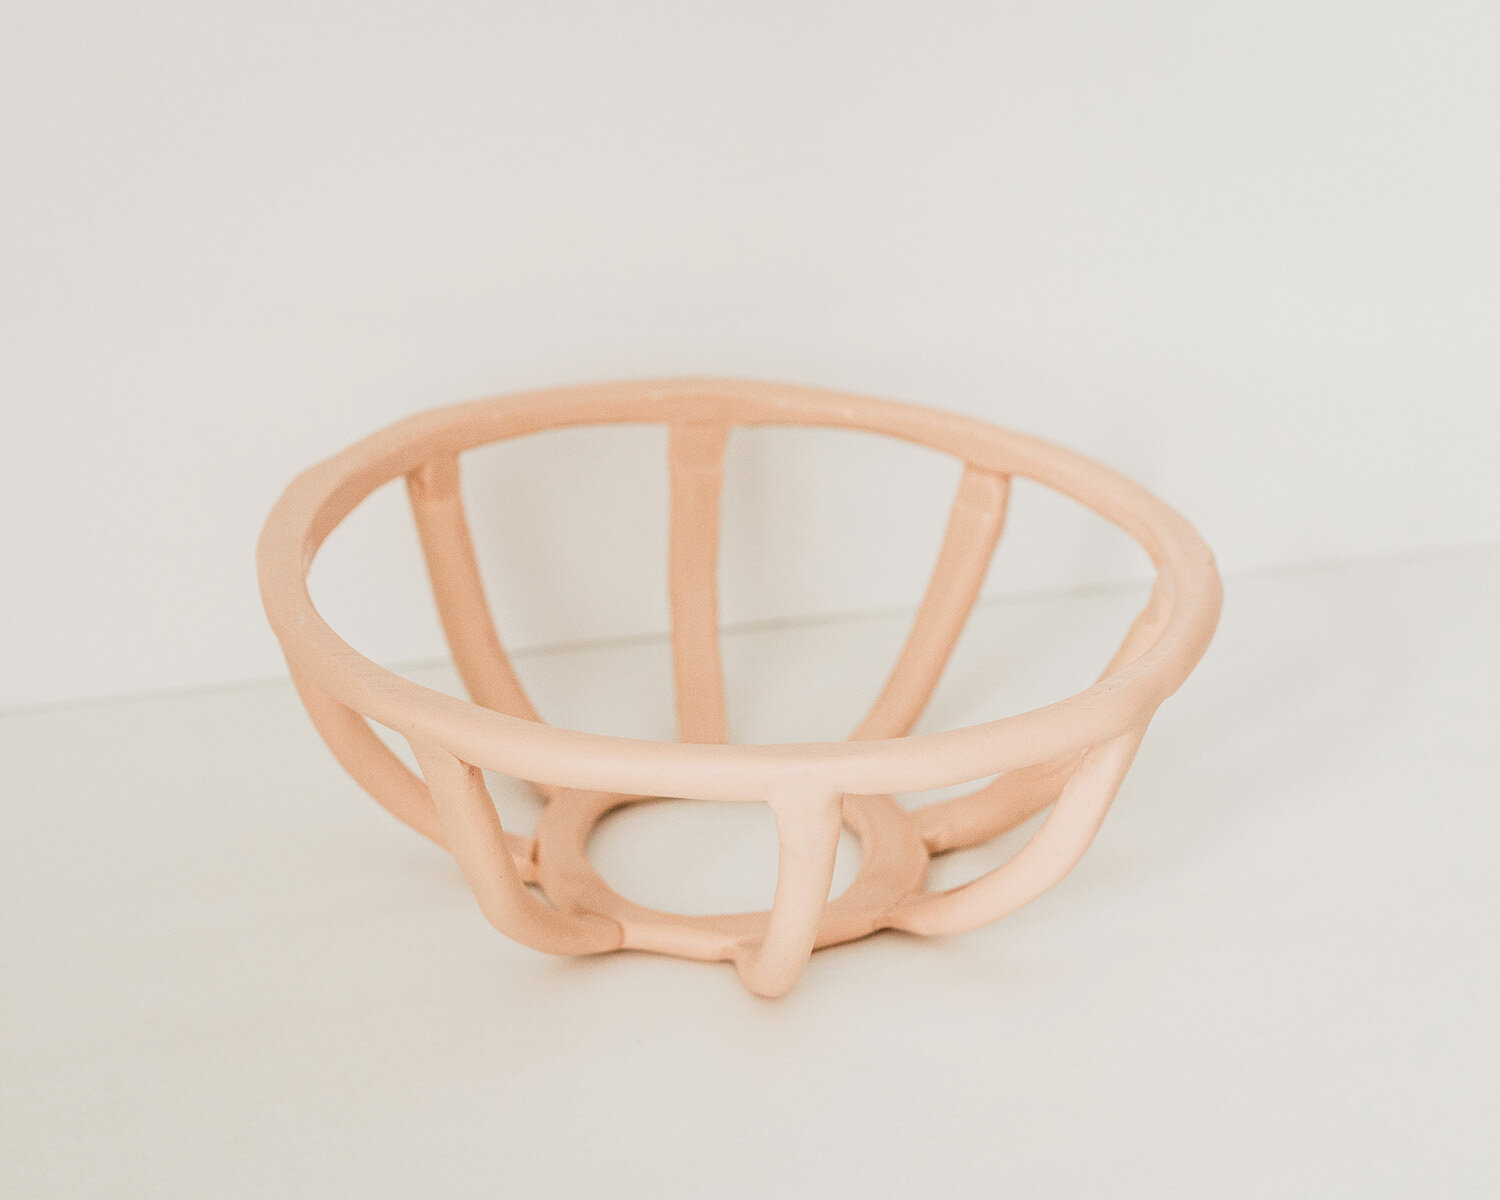
Handmade Nested Coil Prong Fruit Bowl
The best part about this coil prong fruit bowl DIY is that it’s very inexpensive since you most likely own a lot of the needed materials. The only thing I had to purchase to make my fruit bowl was the oven-bake clay. Feel free to get creative with the color of the clay and remember that you can always paint the bowl if you’d like it to be a different color than the clay you created it with.
Materials:
-
Toothpicks
-
Parchment Paper
-
Oven Safe Bowl
-
Baking Sheet
How To Make Your Own Fruit Bowl
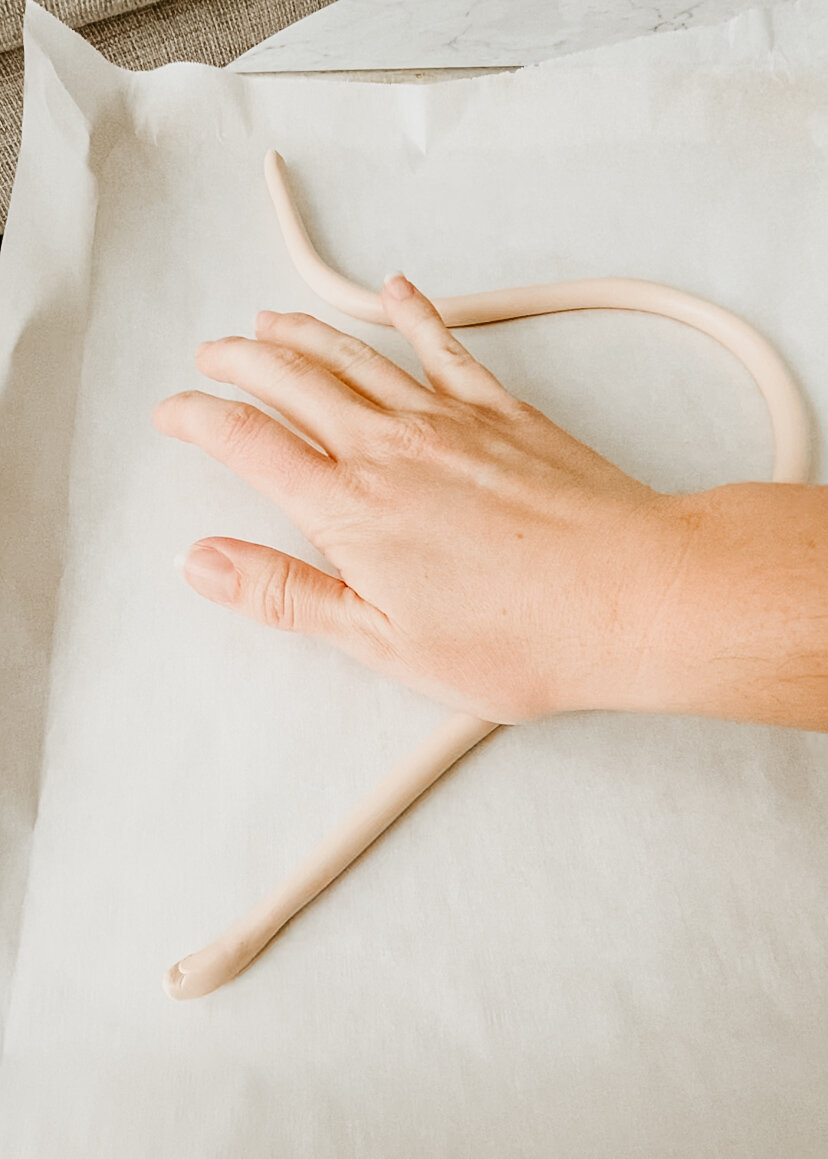
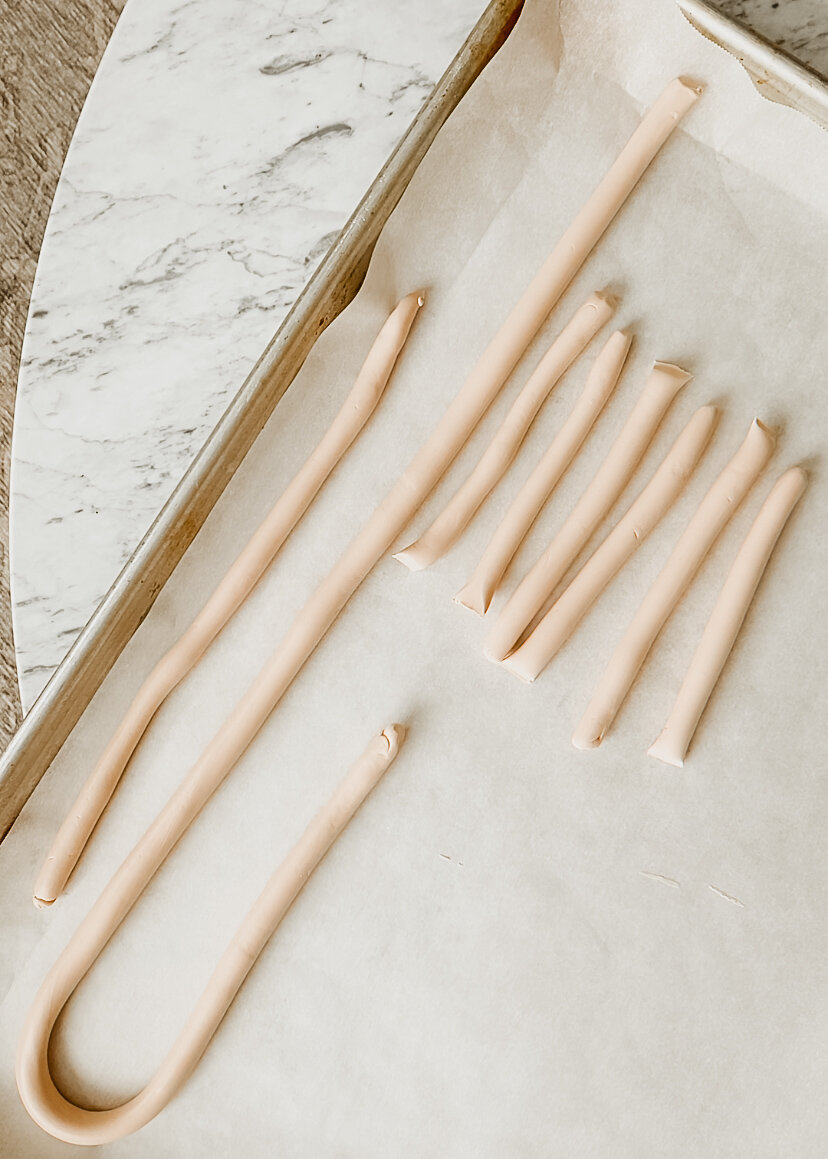
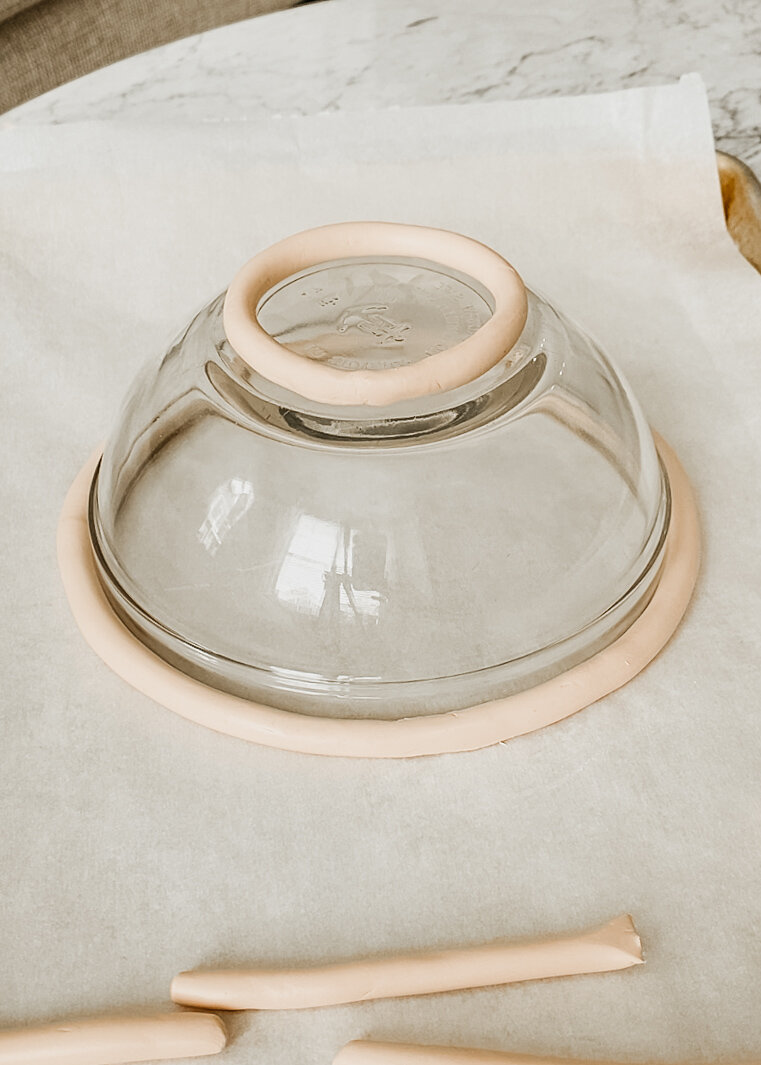
Start with a clean surface and make sure to lay down parchment paper if working with colored clay to prevent staining. I placed parchment paper directly to the baking sheet to use as my work surface. Take a handful of clay and warm it up in your hands by moving it around. Then, start to roll out your clay as evenly as possible in long, log-like pieces. Try to keep the pieces around the same thickness for a cohesive look anywhere from 1/4 inch to 1 inch wide.
Place your oven-safe bowl facing down and wrap your longest piece of clay around the rim, adjusting the length if needed to create a perfect hoop hugging the bowl but not pressed too tightly against it. Take the next longest piece to repeat a smaller hoop along the top of the upside-down bowl to create the base of the clay fruit bowl. Score both ends before connecting the hoop. Use a small amount of water to wet the ends if needed and then blend together as seamlessly as possible.
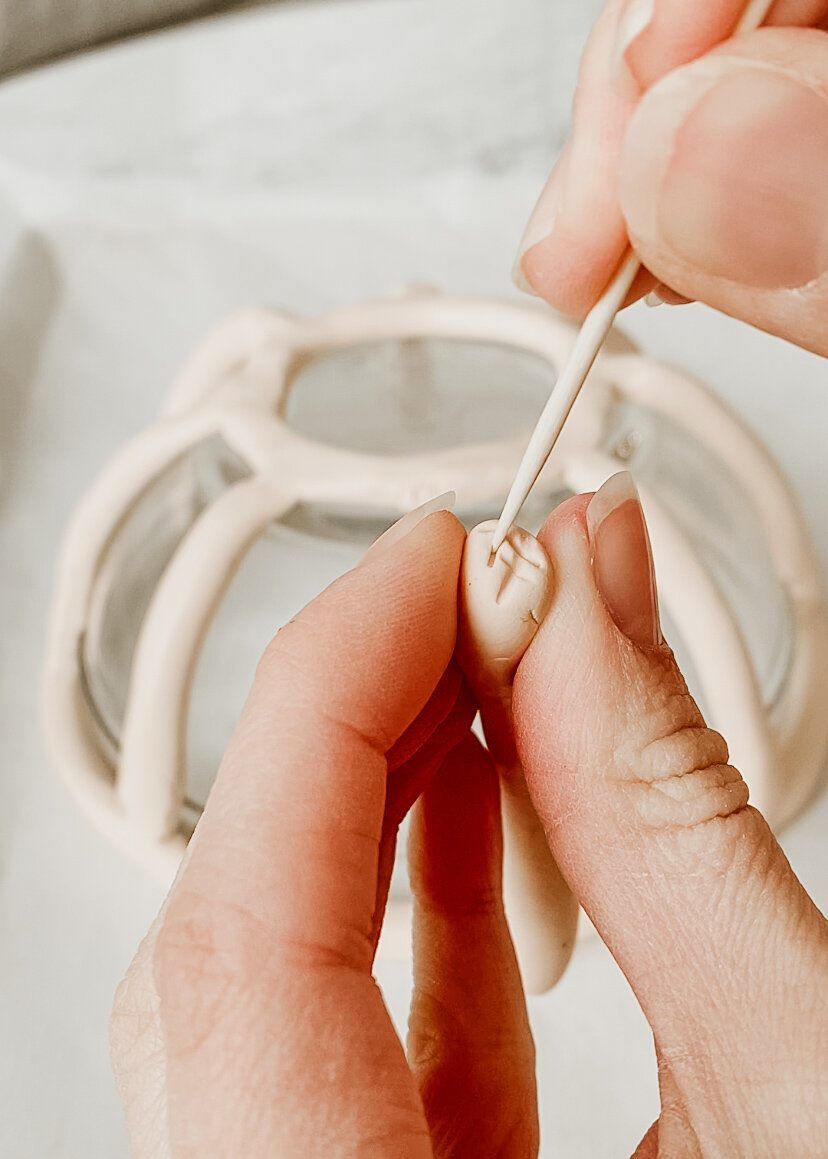
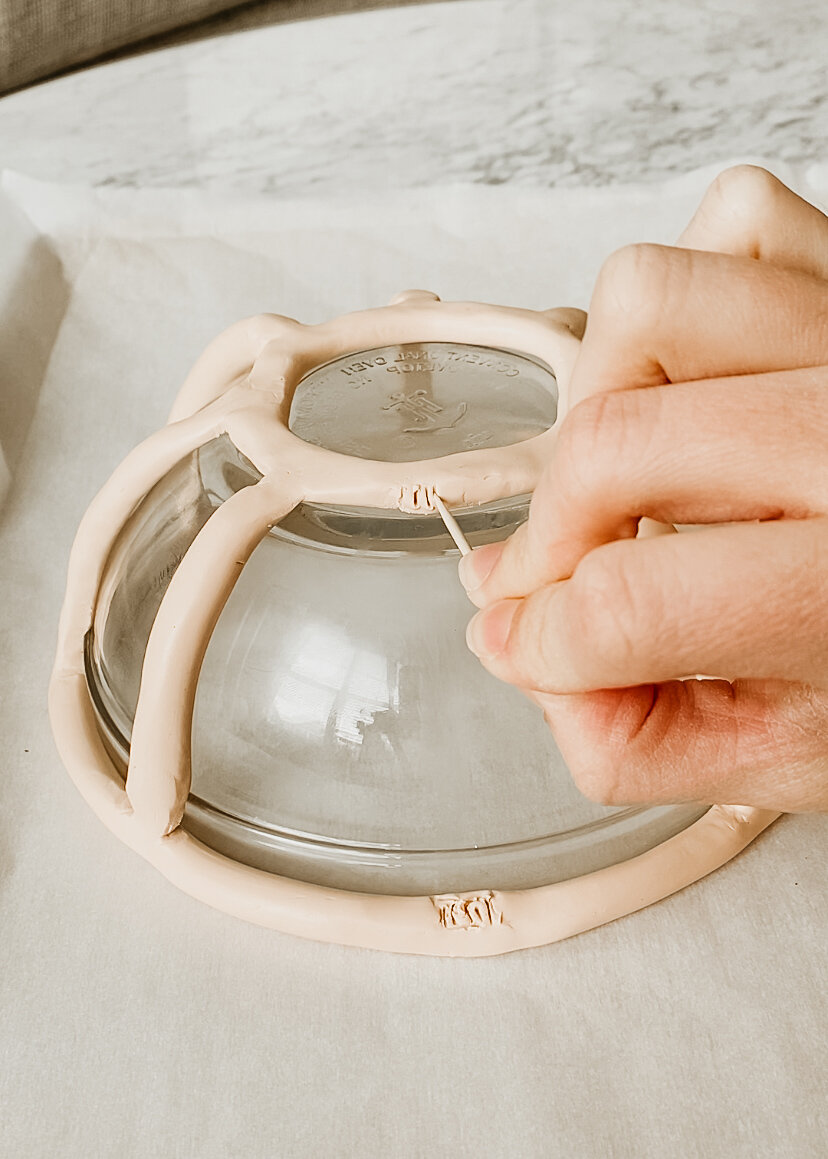
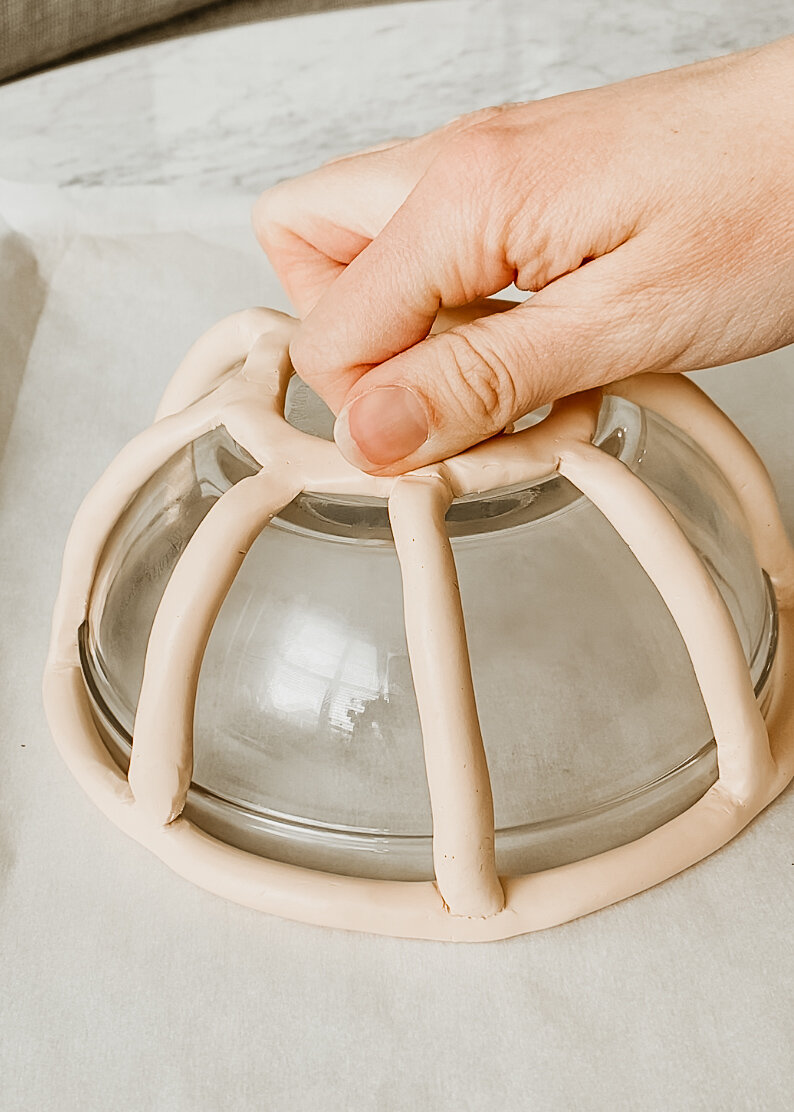
Then, work in sections to create the prongs around the bowl by scoring the ends of the pieces as well as the area of the hoop the section will be attached to. Depending on the size of your bowl the number of prongs may vary but I found 8 prongs to be a perfect amount for this size of bowl. Blend each of the joints between the hoops and the prongs to create a seamless look. I used both my fingers and a toothpick to help blent the joints.
#block-yui_3_17_2_1_1614262732835_145536 .sqs-gallery-block-grid .sqs-gallery-design-grid { margin-right: -10px; }
#block-yui_3_17_2_1_1614262732835_145536 .sqs-gallery-block-grid .sqs-gallery-design-grid-slide .margin-wrapper { margin-right: 10px; margin-bottom: 10px; }
Click here to watch a video demonstration of this DIY clay fruit bowl process.
Once you have fully assembled the clay hoops and prongs around your oven-safe bowl, it’s time to bake! Follow the baking instructions on your clay packaging based on the thickness of your clay bowl. After baking, allow the clay fruit bowl to cool before carefully removing it from the oven-safe bowl. I had to gently press in small sections to remove my clay fruit bowl from the oven-safe glass bowl I used as a mold.
Once your bowl is removed you have the option to paint it or leave it as is. You can then style your handmade nested coil prong fruit bowl on a shelf as decor or use it in your kitchen as a function fruit bowl.
I hope you found this DIY clay fruit bowl tutorial helpful and feel inspired to make your own. This easy clay craft is definitely a fun way to save money on a new home decor piece. If you give this DIY a try, be sure to tag me or send me a photo on Instagram.
– Olivia
more posts you may enjoy
Featured
Featured


Featured
Featured

Hey lovely, how much clay did you need?